



















Trust Roofing Installation Standards
4.08 Sealing Pipes and Vents on TPO Roof Systems
How to correctly boot, flash, and seal pipes, vents, and penetrations on a TPO roof system so they remain watertight long-term.

Roofing work involves working at height and requires proper safety equipment and training. The information in this course is intended for educational purposes. Homeowners should consult a licensed roofing professional before attempting roof repairs or modifications.


Other Courses
Overview
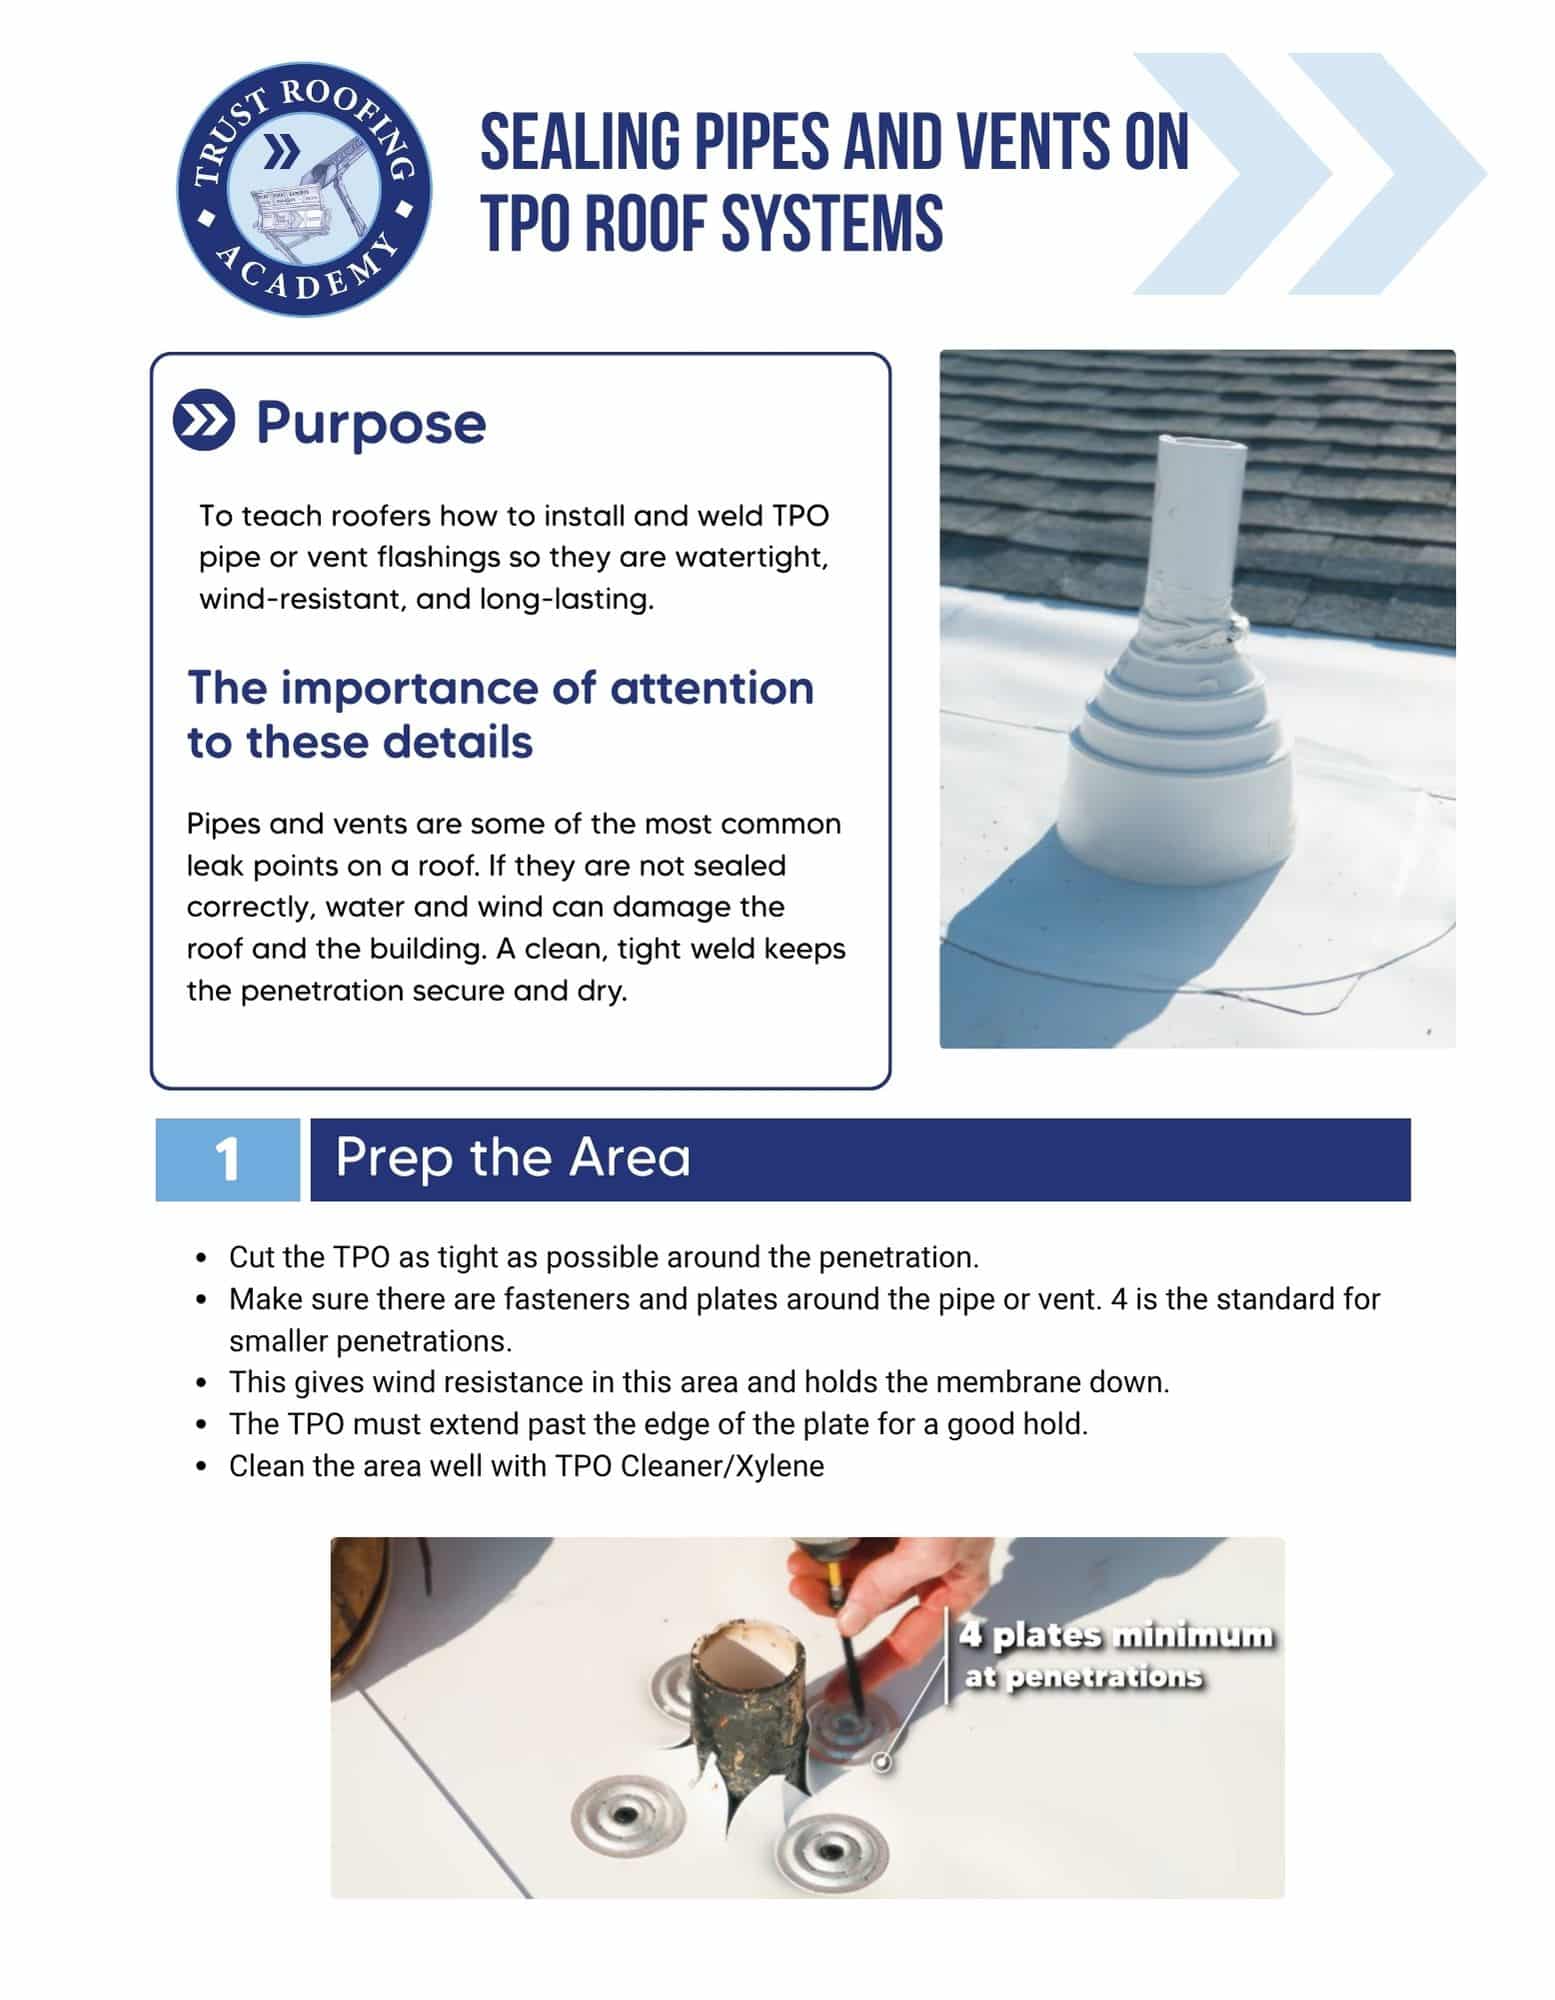
Every pipe, vent, drain, and mechanical penetration through a TPO roof system is a potential leak point. The pipe boots, pitch pans, and membrane details around these penetrations must be installed correctly and sealed completely to ensure long-term waterproofing performance.At Trust Roofing, penetration sealing is treated as a critical waterproofing detail — not a minor finishing step.
Our Field Standards
Penetration sealing follows Trust Roofing field standards for TPO roofing systems.Field standards include:* Every penetration is addressed before the project is signed off — no penetration is left incomplete* TPO pipe boots are used for round penetrations where the pipe diameter is within the boot range* The boot flange is welded to the field membrane using a hand welder* All weld areas at boots are probed after cooling* Pipe boot seams at the pipe collar are sealed with TPO-compatible sealant* Any penetration too large or irregular for a standard boot uses a pitch pan
Our Process
Types of PenetrationsRound Pipes (within standard boot size range):* Use a TPO pipe boot sized for the pipe diameter* Slide the boot over the pipe before membrane installation if possibleIrregular Penetrations:* Use a pitch pan — a metal pan set around the penetration and filled with pourable sealerDrains:* The membrane is clamped between the drain bowl and the drain ring* Follow the drain manufacturer’s installation instructionsInstalling a TPO Pipe Boot1. Clean the pipe and surrounding membrane surface2. Slide the boot over the pipe3. Position the boot flange flat on the membrane surface4. Apply a bead of TPO sealant at the base of the pipe collar5. Weld the boot flange to the field membrane around the full perimeter6. Apply the silicone roller immediately after welding each section7. Allow to cool8. Probe the full weld perimeter9. Apply a final bead of compatible sealant at the top of the boot collarInstalling a Pitch Pan1. Cut the membrane to accommodate the pitch pan footprint2. Set the pitch pan in TPO adhesive3. Weld the pan flange to the field membrane4. Fill the pan with approved pourable sealer to the correct level5. Allow to cure before sign-off
Roofing Terms
TPO Pipe Boot
A pre-formed TPO membrane boot sized for standard pipe diameters, slides over a plumbing vent or other round penetration and is heat-welded to the field membrane to create a watertight seal around the penetration.
Pitch Pan
A metal pan installed around an irregular roof penetration, such as a conduit cluster or structural support, and filled with pourable sealer to create a watertight enclosure when a standard pipe boot cannot accommodate the penetration shape.
Pourable Sealer
A two-component or single-component rubberized compound used to fill pitch pans around TPO roofing penetrations, creates a flexible, watertight seal that accommodates thermal movement in the penetration.
Florida Penetration Code Requirements
Florida building code requires that all penetrations through a flat roofing membrane be properly flashed and sealed, a standard inspection item on permitted TPO roofing projects in Tampa Bay.
Roof Drain
A drainage component installed through the TPO membrane and roof deck to collect and direct water into the building’s drainage system, the membrane is clamped between the drain bowl and drain ring per manufacturer instructions to create a watertight connection.
Need more help?
We've built a library of resources for homeowners, property managers, and those looking for roofing help.
View Resources