











Trust Roofing Installation Standards
4.05 How to Install TPO Clad Drip Edge Metal
How to cut and install TPO-clad drip edge along the perimeter of a flat roof so water drains cleanly and the membrane edge is protected.

Roofing work involves working at height and requires proper safety equipment and training. The information in this course is intended for educational purposes. Homeowners should consult a licensed roofing professional before attempting roof repairs or modifications.


Other Courses
Overview
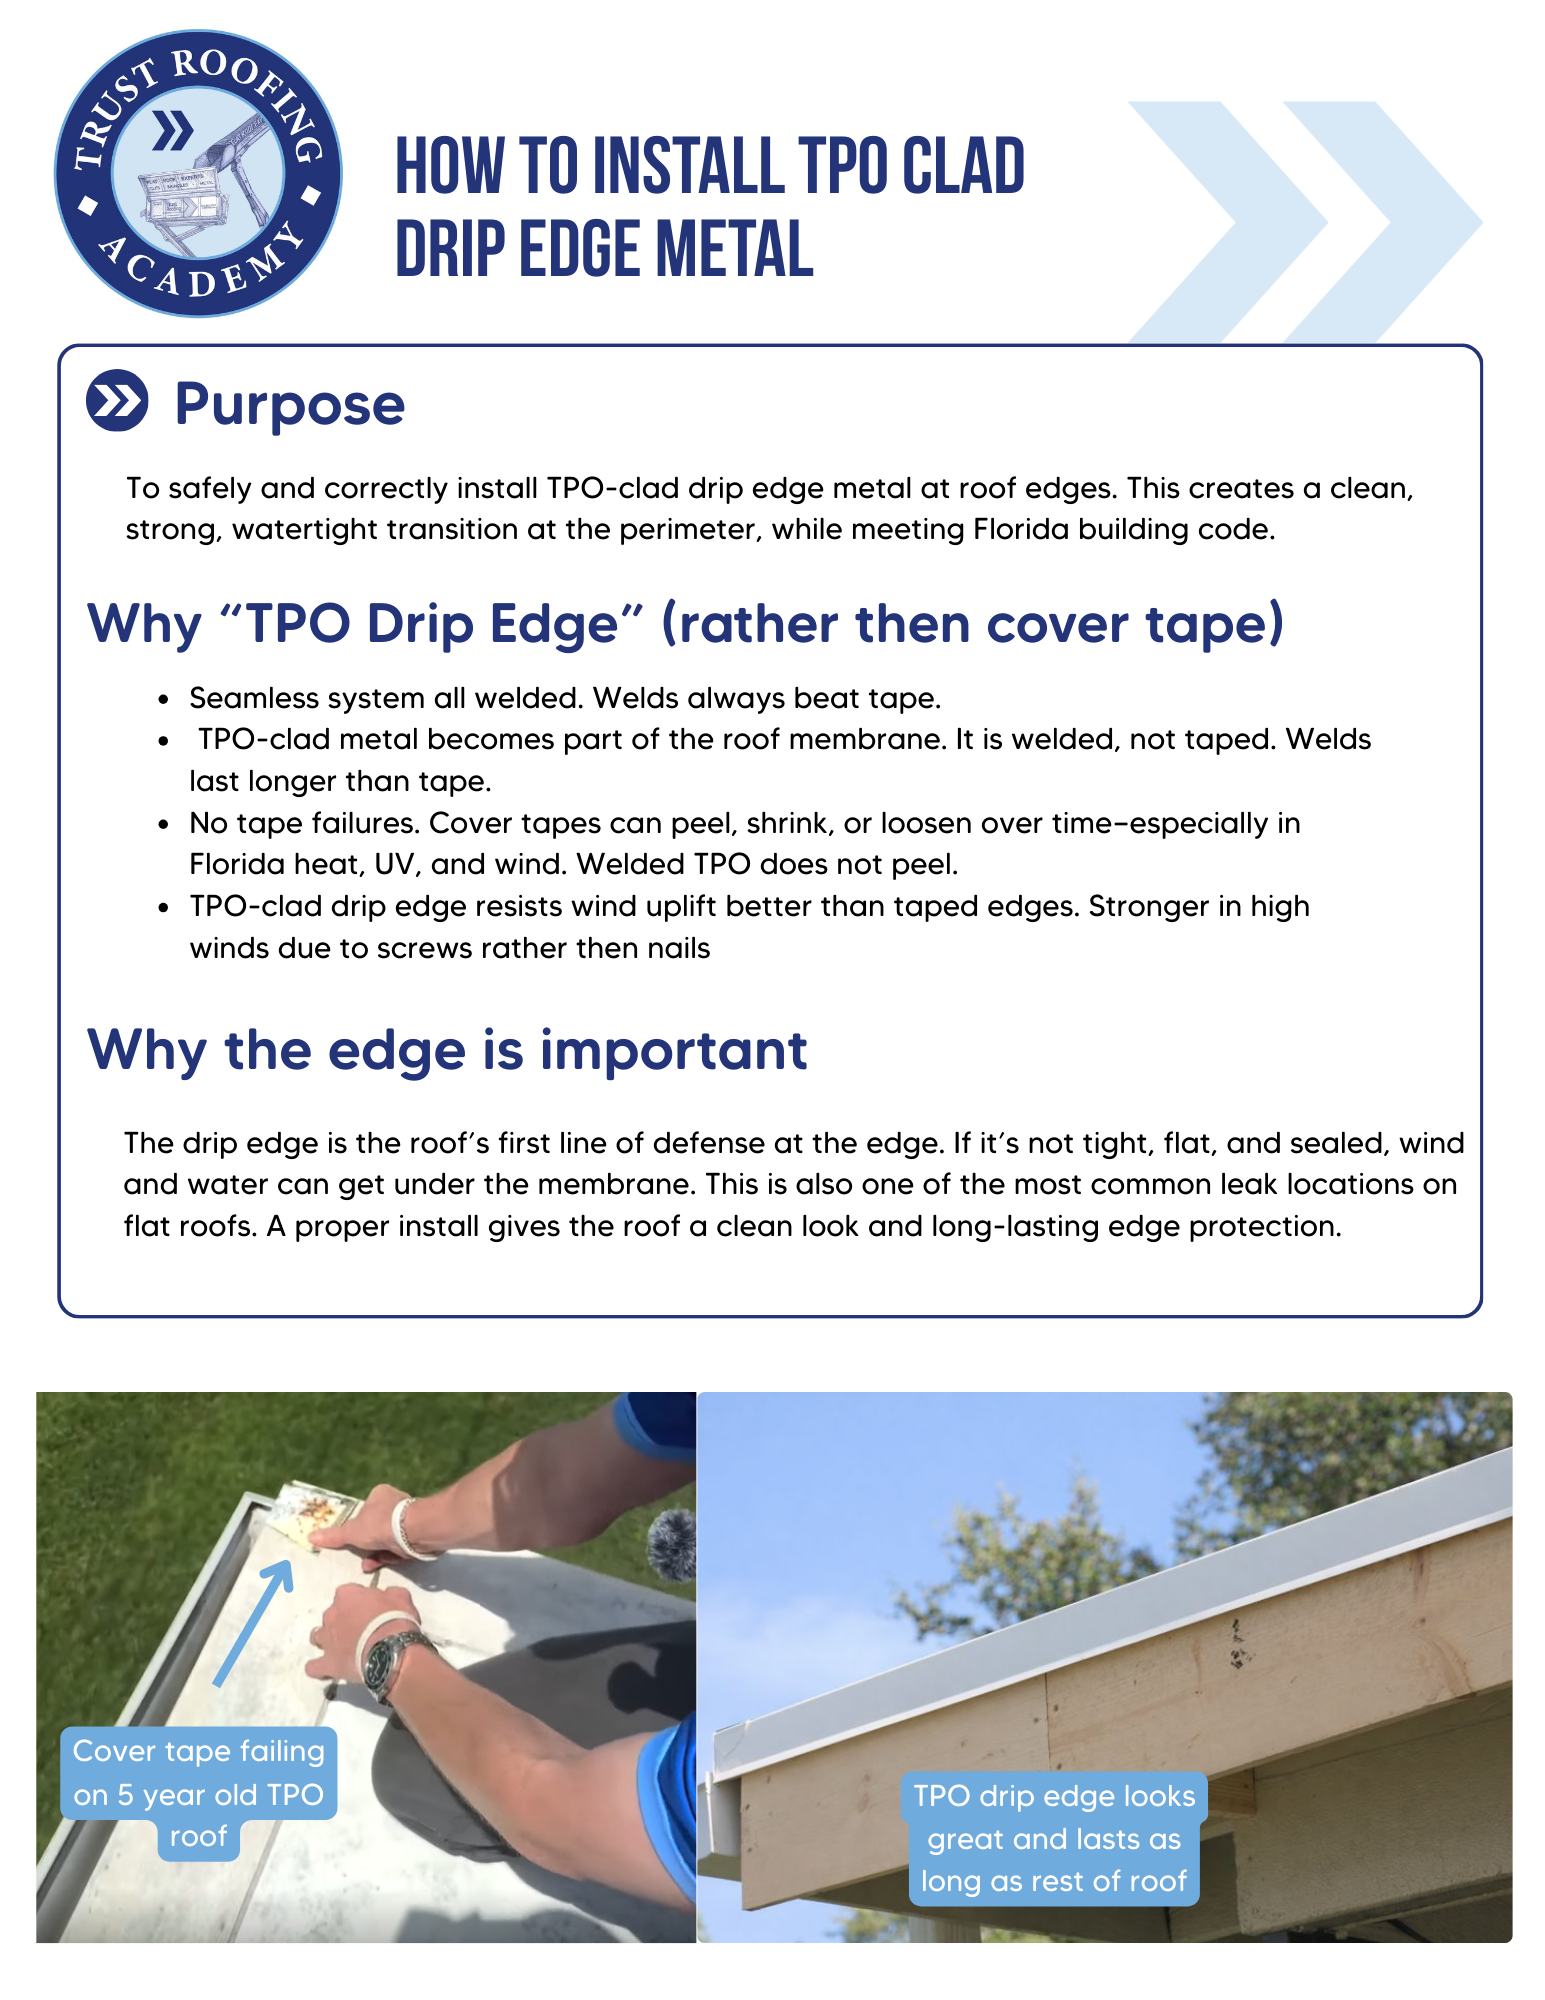
TPO clad drip edge is a metal drip edge profile laminated to a strip of TPO membrane. It is installed along the perimeter of a flat roof to provide a clean, watertight termination point for the membrane and to direct water off the roof edge away from the fascia.At Trust Roofing, TPO clad drip edge installation is a critical perimeter detail that must be done correctly before the field membrane is installed.
Our Field Standards
TPO clad drip edge installation follows Trust Roofing field standards.Field standards include:* Drip edge is installed continuously along all roof perimeter edges before field membrane is installed* The metal drip edge is secured to the deck — not just to the membrane* Joints between pieces overlap a minimum of 2 inches with upper pieces over lower pieces* The TPO flange of the drip edge is welded to the field membrane using a hand welder* The drip edge extends past the fascia to direct water away* All corners are fabricated with inside or outside corner pieces — not bent on site
Our Process
Preparing the Perimeter* Confirm the deck edge is clean, solid, and free of damaged wood* Confirm the fascia is in serviceable condition* Mark the perimeter for consistent alignmentInstalling the Metal Drip Edge1. Position the drip edge at the roof edge with the lower flange extending past the fascia2. Fasten the upper flange to the deck per specification — typically 12 inches on center3. At joints: upper piece laps over lower piece by minimum 2 inches4. At corners: use pre-fabricated inside or outside corner piecesWelding the TPO FlangeAfter the metal drip edge is secured:1. Roll out the field membrane to the perimeter2. The field membrane overlaps the TPO flange of the drip edge by the minimum weld width3. Weld the field membrane to the drip edge flange using a hand welder4. Test weld strength by probing with a probe tool — no lifting at any pointCommon Errors* Not securing the metal to the deck — relying only on the weld* Joints installed backward — water gets into the overlap* Bending outside corners on site — creates stress points that crack* Under-welding at the perimeter
Roofing Terms
TPO Clad Drip Edge
A roofing perimeter termination component consisting of a metal drip edge profile bonded to a TPO membrane strip, provides a watertight edge termination that can be welded directly to the field membrane using a hand welder.
Perimeter Fastening Zone
The area within approximately 5 feet of the roof edge, subject to the highest wind uplift forces on a flat roof and requiring increased fastener density per Florida building code compared to the field area.
Corner Zone
The area within approximately 5 feet of a roof corner, subject to the highest wind uplift forces on the entire roof and requiring the highest fastener density per FBC wind uplift requirements.
Weld Width
The width of the bonded area created by hot air welding at a TPO seam, minimum weld width is specified by the membrane manufacturer and must be achieved throughout the installation to meet Florida product approval requirements.
Florida Product Approval
The Florida Building Commission approval required for all roofing products and systems installed in Florida, TPO membrane systems must be installed per their approved installation instructions to maintain compliance.
Need more help?
We've built a library of resources for homeowners, property managers, and those looking for roofing help.
View Resources